Five Fresh Healthy Summer Drinks

Tomorrow is the first day of May, and I can’t believe how fast the year is flying by. We had another chilly spell this week after all those tornadoes we had on Sunday evening. In fact, Sunday was spent huddled in the hallway with pillows over our heads and tornado sirens blaring in our ears. My poor car had hail damage twice in one weekend…Spring is beautiful, but spring storms are not!

So, I am ready for some warm summer weather and glorious sunshine! Nothing says summer like a cool, refreshing drink. Sipping a fruity drink, reading a book on a porch swing is the epitome of a summer afternoon for me. I’ve rounded up my top five summer drinks, that are also healthy too!

5healthysummerdrinks

1. Pink Grapefruit Soda Pop

2. Vanilla Milkshake

3. White Tea Fruit Slush

4. Berry Chia Fresca

5. Skinny Kiwi Lemonade

Enjoy!

Chocolate Series: Why is Chocolate Bad for Dogs?

As a chemist, there are a few things I am good at. One is research, the other is chemistry (obviously). I love researching and digging into anything and everything I find an interest in. It could be something scientific, or it could be something like the best face wash under $10. Either way, I enjoy it! One of my plans for this blog and my academic business is to share information I know or neat ideas I learn with others. So, I will be starting a little lesson series on research that I have conducted in any given area, and sharing it with you! Now, don’t worry, this is fun stuff! Maybe it is just some fun facts, or maybe it is the best way to grow a rose, or perhaps it is something about baking…the possibilities are endless. First up, is a series on chocolate!

Chocolate Series volume1Chocolate is one of my favorite things, and it is absolutely fascinating. It has many chemicals that comprise it, and many purposes. This series will contain some great facts on chocolate including baking aspects, health benefits, and more. Volume 1: Why is chocolate bad for dogs?

lesson1.1I am an expert in all things chemistry, and in particular chocolate! I did my final research in college over the chemistry of chocolate and learned some awesome things about this chemical.

We all know that chocolate is bad for dogs. You have heard it your entire life. What I never knew was why is that? Well, I will tell you.

Chocolate contains two main chemicals: caffeine and theobromine. The culprit for dogs is theobromine which is a methylxanthine. Big words I know. But basically dogs cannot break down methylxanthines, whereas, humans can break it down and excrete it efficiently.

There are two key factors in how chocolate effects your dog:

1. Type of chocolate
2. Weight of your dog

Here is a quick reference in order from HIGHEST amount of theobromine to LEAST amount:

  • Dry cocoa powder
  • Baker’s chocolate
  • Semi sweet & dark chocolate
  • Milk chocolate
  • White chocolate (which basically has no theobromine)

The smaller your dog, the more likely they will be effected by chocolate. So, if you have a 10 lb dog that ingests some chocolate, they will be more susceptible to toxicity. For a quick reference on dog weight, check out this great link: Chocolate Toxicity Table

As always, consult with your vet if your dog accidentally eats some chocolate…better safe than sorry!

**I am not a veterinary expert, but I am a chemical expert. I also own dogs so this is my personal and chemistry background. Always check with a vet if your dog has symptoms or if they may be in danger of toxicity.

http___signatures.mylivesignature.com_54493_137_30F44ADF8D9E8604A3652A9FACFB31E1

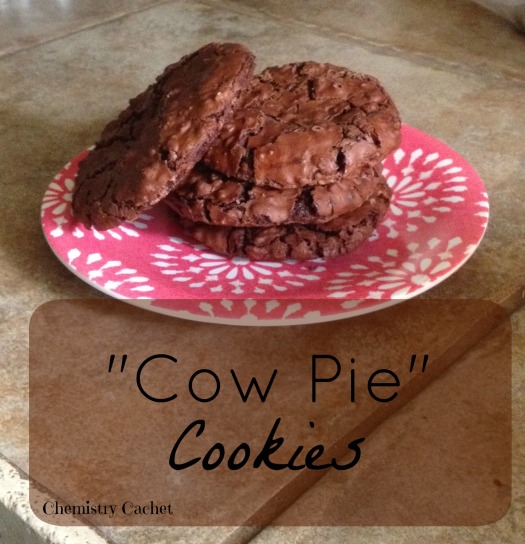
Cow Pie Cookies

As many of you know, I am from Texas. More notably, from a small country town where seeing cows in a neighborhood is not unusual. In fact, it’s quit common! So, while I was experimenting with this recipe over the past few months, each time I popped a pan out of the over, my husband said, they look like cow pies! Therefore, that is the official name now 🙂

cowpiecookies2I love baking with chocolate. As I mentioned in this post, I studied chocolate in college and all the chemical aspects of this divine ingredient. My husband can’t have dairy due to health issues, so I have been trying to come up with an alternative to his favorite, the chocolate chip cookie. These are more of like a brownie than a cookie, but they are light and fluffy. They definitely satisfy any sweet tooth. I got my inspiration from H-E-B grocery store because they have a “chocolate chewy” cookie in the bakery that is pretty good. Their cookie is more airy though, but the taste is very similar.

The secret is dutch process cocoa powder instead of regular. I will go in to depth on the blog soon about the difference between dutch and regular cocoa powder. But, for now, on to the recipe 🙂

cocoa-174872_640

“Cow Pie” Cookies

  • 3 cups powdered sugar
  • 1/2 cup + 3 tbsp dutch process cocoa powder
  • 2 cup pecan halves (could use walnut)
  • 1/4 tsp salt
  • 3 or 4 egg whites (room temperature)
  • 2 tsp vanilla
  • 1/2 cup mini chocolate chips
  1. Preheat oven to 350º. Line baking sheet with parchment (may even want to spray it).
  2. Chop pecan halves into small pieces and put in medium size mixing bowl, add the cocoa powder, powdered sugar and salt. Whisk together.
  3.  Add the vanilla, and egg whites. Whisk together until moist and batter is thick. If the mixture seems incredibly thick (too thick to move whisk through), add another egg white. I always need 4, but egg size can fluctuate. Start with 3.
  4. Scoop batter with spoon onto prepared baking sheets with space between since cookies spread. (This should make about 24 or so cookies)
  5. Bake 12-14 minutes until the tops begin to crack and cookie is firm around edges. (Sometimes I have to leave them in 15 minutes depending on how much I over stir the mix :))
  6. Let cookies cool almost completely on the sheet, then transfer to cooling rack.

I use a cookie scoop to get the cookies to all look alike. The one I use holds a little over 1 tablespoon. I hope you enjoy this great chocolate cookie.

http___signatures.mylivesignature.com_54493_137_30F44ADF8D9E8604A3652A9FACFB31E1

DIY Bulletin Board

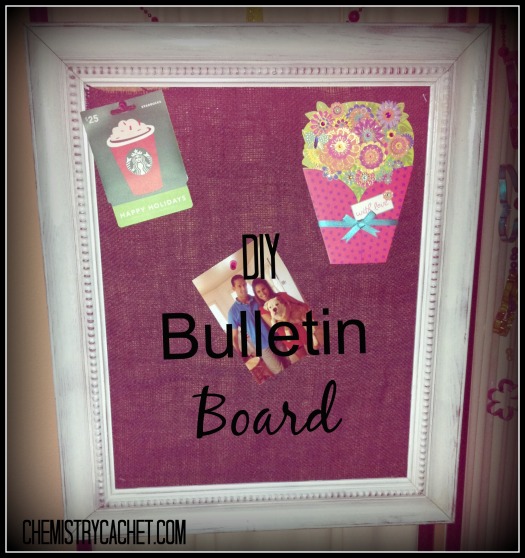
This DIY is so easy, there is really no need for instructions. You can pretty much do it however you please 🙂 I did this last week and it took about 30 minutes total. Here is the basic idea…

bulletin boardI purchased an old white frame at a flea market for $1.00! It has been sitting in the garage for a few months and I decided to make a bulletin board for my office. I always need something to put work stuff on, or pin little pieces of paper, but I wanted something cute at the same time. My office has a vintage theme, so I thought this frame would fit in well.

So, all you need is:

  1. Old empty frame
  2. White foam board or even a cork board
  3. Piece of burlap (optional, but pretty)
  4. Staple gun (or little nails)
  5. Sawtooth hangers

First, I cut the foam board to fit the back of the frame, then used a small staple gun to staple it to the back, making sure it was going into wooden frame. You could easily use penny nails, or even a tack gun. (probably even a glue gun!) Anything to get the job done.

Next, I found some black burlap that I cut to fit the inside of frame. I stapled that to the front of foam board so it would look pretty (totally optional though).

Lastly, I just put a sawtooth hanger on the back so it could hang from wall or any surface.

That’s it! Obviously, the burlap and even sawtooth hanger are optional. It would also be cute to just rest it on a desk or table.

DIY bulletin board

I actually put some ribbon inside the sawtooth hanger and hung it from my decorative room divider behind my desk 🙂

Just a fun, easy, cheap way to use an old frame!

http___signatures.mylivesignature.com_54493_137_30F44ADF8D9E8604A3652A9FACFB31E1

Friday Favorites

I hope everyone enjoys this beautiful spring Friday and has a great weekend! Here are some pictures from this week.

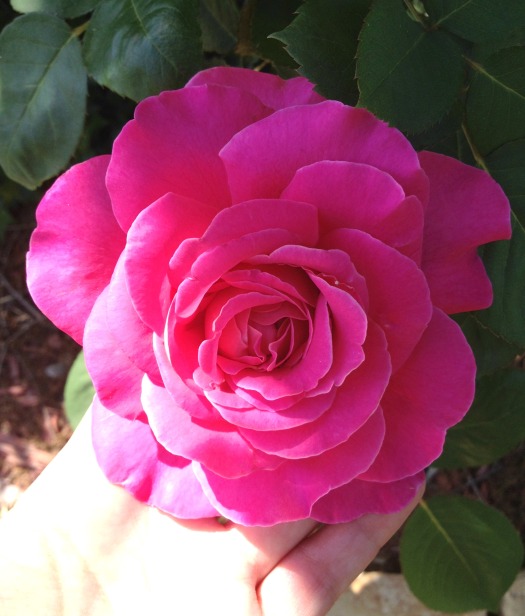
3My pink rose started blooming this week. It smells incredible!

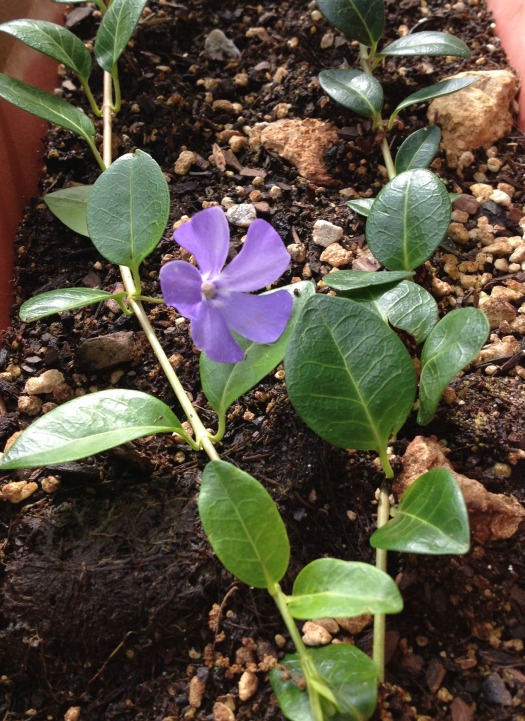
6I planted a little periwinkle plant a few weeks ago, and it started blooming this week. I love the delicate flowers it makes!

5My favorite part about spring in Texas is the wildflowers! The ditch in our front yard is still covered in Bluebonnets and Indian Paintbrushes.

2Anything pink catches my eye, it is my favorite color by far. We went to eat last night in another town and I saw this old building down the street. Pretty!

http___signatures.mylivesignature.com_54493_137_30F44ADF8D9E8604A3652A9FACFB31E1

Bulldog Life

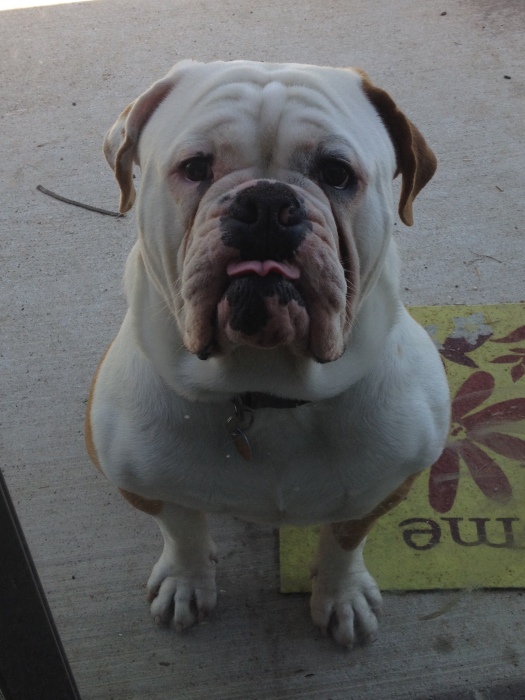
2015-04-17 13.57.53-1The man of our house is most definitely our Bulldog, Ruger (pronounced Roo-gur, like the gun brand). He is by far the quirkiest, silliest, craziest, most precious joy in our lives! Not a single day goes by that he doesn’t make us die laughing or make our hearts melt. It’s a good thing he is so adorable because he sure can be a little toot! Like hiding under our bed when it is time to go outside (he truly hates the outdoors if it is cold, warm, raining, too sunny, humid….), or not letting me leave the house when it is time to go somewhere (think grabbing my leg with really sad puppy eyes and not letting go!). Weighing in at almost 80 lbs, he pretty much gets his way when I am the only one around 🙂

2015-03-30 15.23.42 2015-04-02 12.20.44Follow along on instagram, asrochester or #rugerthebulldog 🙂

alexis

Cake Batter Dip

For my best friends wedding shower, we had a beautiful vintage theme at my parents home. It was very special since she and I have so many memories in that house (20 years worth). Her bachelorette was the same weekend (read about that here!), and we wanted to keep the vintage theme going. My mom spent about a month transforming her home into a beautiful landscape of vintage pinks, creams, and pearls. Normally, I am the friend and family member who bakes all the desserts (it’s the chemist in me), but I had absolutely no time to do so for this event.

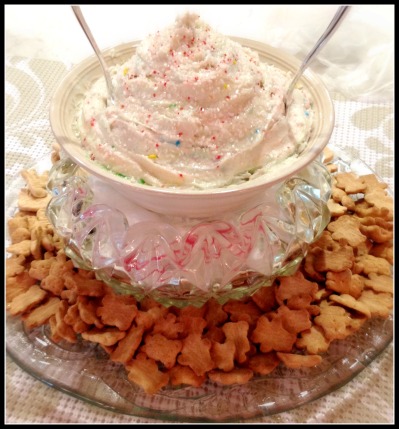
cakedipI searched around on pinterest for something cute and easy. I found this fun recipe and decided to give it a try with a couple of changes. Now keep in mind, this isn’t healthy, but it is low in fat and very simple!

dipCake Batter Dip

(recipe adapted from Eat Yourself Skinny)
  • 1 Box of white cake mix
  • 2 cups of vanilla Greek yogurt (non fat)
  • 2 cups of light cool whip
  • Sprinkles ( I used regular, pink, and crystal)

Mix together yogurt and cake mix, then add in cool whip to mix until combined. Chill for at least 2 hours(or longer), then sprinkle the top with beautiful sprinkles.

I wanted to give mine the illusion of an ice cream cone top, so I swirled it with spoons. It was a huge hit at the party!

4 Easy Tips on Potted Geraniums

I have been growing geraniums for about 8 years now. I picked up a cheap little one at a farmer’s market when we lived in San Diego. It was pink and cute so I thought I would give it a try. Obviously, the sensational climate in Southern California prompted that tiny Geranium into growing about 10 times its size and flourishing with bright pink blooms year round. I kept it in a pot since we lived in an apartment, but I eventually had an entire balcony full of them. Even in our neighborhood there, Geraniums grew on the side of the streets and in open fields. Beautiful!

Fast forward to living back in Texas, the climate is not perfect at all. In fact, we have more hot or cold days, then mild. So, all my beloved potted Geraniums needed much more love and attention here in Texas, especially surviving the scorching hot summers. So, I have learned some tips and tricks over the years to growing healthy potted Geraniums.

I’ve noticed that the literature on gardening can get confusing if you don’t know the lingo. I took horticulture classes in college and was able to understand the technical terms, but it took awhile. But don’t worry, these tips are for anyone!

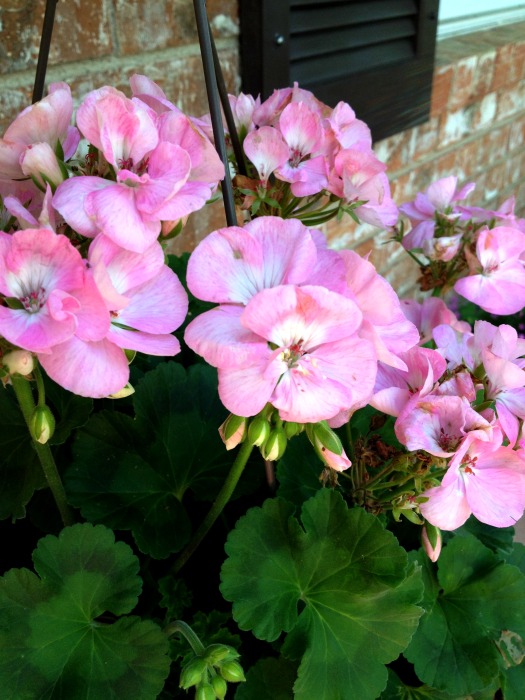
tips1. They hate too much water!

  • It is best to let them completely dry out before you water again. Then water in the morning until soil is damp.

2. They love sun, at least 6 hours a day.

  • Choose a spot that gets morning and early afternoon sun. If you live in an area that gets incredibly hot in the summer (like me!), make sure they are in a spot with good afternoon shade.

3. They love to be deadheaded and pruned.

  • Always deadhead (just a gardening term for cut or pinch off) blooms that are on their last leg. I also prune leaves that look yellowish. The more you get rid of spent blooms, the bigger and more full it gets. If I don’t like the shape of mine, I will even go in and remove leaves that are catawampus (askew or crooked haha).

4. They do like a little bit of fertilizer every few weeks.

  • I’m not a zealous fertilizer user for my potted plants, but I do like to add some in the spring months to get them off on the right foot. You can use natural like epsom salt ( 1 tsp per about 1 gallon water). Or just pick up some miracle grow. Add 1 tbsp per 1 gallon water, and add a bit when you water your plant every 2-3 weeks. I don’t normally fertilize in the really hot months so I can avoid burning the plant 🙂

Bonus Information: Winter inside by a window with sun with very little water unless they look like they need it. Geraniums get root rot very easily, so never over water. Use a large pot with room for drainage so they have room to grow!

geranium5alexis

Vintage Weekend

My favorite time period is the Victorian Era. I am totally captivated by the customs, etiquette, architecture, fashion, and lifestyle in general. If time travel were possible, I would transport myself there in a heartbeat! This weekend I planned an intimate little bachelorette party for my best friend of 27 years (friends since we were 1!). I did some research for something unique and special, and stumbled upon a vintage tea at The Ashton Hotel in downtown Fort Worth. I immediately knew it was the perfect thing for us to do. We are both lovers of all things vintage and nostalgic for those by gone days. I grew up around Fort Worth and have never heard of this, so I was thrilled to get a chance to try it out. I could do a whole post on the history of The Ashton Hotel, but most people wouldn’t find that very interesting 🙂 But I will tell you this structure dates back to 1915!

ashton1 2015-04-18 13.46.31-1They include valet parking which is always a good mark in my book. Then we spent a few minutes inside the sitting area of the lobby to be called for tea. The waiting area was the perfect blend of vintage and modern, so we were delighted in the ambiance.

ashton4 ashton5The tea itself was incredible. The treats came out in courses, and all the food was delicious…but the scones were absolutely to die for! They had a large amount of tea selections too with your own little tea pot.

ashton2 If you are ever in the Fort Worth area, I highly recommend making reservations for a Saturday afternoon tea!

alexis

Recycled Paint Can Turned Planter!

Recycling is something I have always had a knack for. Even as a kid, I was coming up with ways to reuse things without having to throw them away. Throwing items away is something I always feel guilty about, especially when they have so much potential. That being said, I also hate clutter, so don’t worry…I’m not a pack rat 🙂

I’ve been watching flea market shows for years and my affinity for repurposing continues to grow. This past winter, we put up a wood privacy fence and stained every square inch of it. It took about 7 gallons total!

I never could bring myself to throw those cans away, I knew there had to be something special for them. I’ve been eying them for weeks, and today I decided to turn one into a planter. I see cute little tin can planters at chic thrift stores selling for at least $10. This was an almost free version. All I had to buy was the paint!

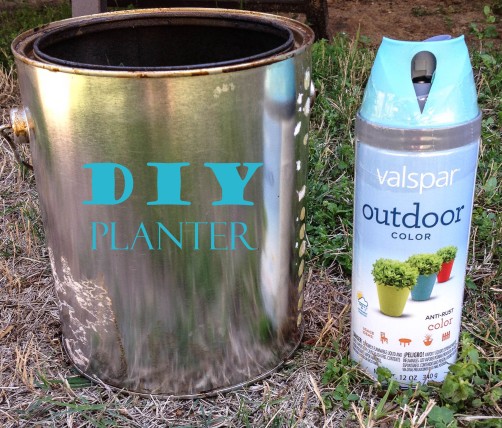
2015-04-15 15.17.50First, you need an old paint can. Remove the label. This label came off pretty easy, but if you need too, soak in hot water, then scrub off. Make sure surface is clean and dry.

Next, make sure you poke holes in the bottom to allow proper drainage. I used a screw driver and hammer. Poke at least 5 or 6 holes. Now, spray a good outdoor paint over the entire surface. I used Valspar outdoor anti – rust. It took about two coats.

2015-04-15 17.46.37Plant anything you like! I recommend filling the bottom with some rocks to allow good drainage, then fill with potting soil. Stick with something smaller that will fit perfect inside.

2015-04-15 17.48.53

I plan on doing some more in different colors, then lining them up on our back yard wall! You can even put it on a little shepards hook, like I did above.

So, there you have it. An almost free, simple little flower pot. 🙂

alexis